Setting up a security camera system may seem like a daunting task, but with the right knowledge and steps, it can be a straightforward process. Whether you’re looking to enhance the security of your home or business, installing security cameras can provide peace of mind and act as a deterrent for potential intruders. This step-by-step guide will walk you through the process, from understanding the basics of security cameras to configuring your system.
Understanding the Basics of Security Cameras
Before diving into the installation process, it’s essential to grasp the fundamentals of security cameras. They come in various types, each with its own set of advantages and features. Understanding these differences will help you make an informed decision when selecting the right cameras for your needs.
Security cameras have revolutionized the way we protect our homes and businesses. With advancements in technology, these cameras have become more sophisticated and reliable, offering a wide range of features to enhance security measures. Let’s explore the different types of security cameras available in the market and the key features to consider when selecting the perfect camera for your specific requirements.
Types of Security Cameras
There are several types of security cameras available in the market, each catering to different surveillance needs:
- Dome cameras: These cameras are known for their discreet design and are suitable for indoor and outdoor use. With their dome-shaped housing, they blend seamlessly into any environment, making them less noticeable to potential intruders.
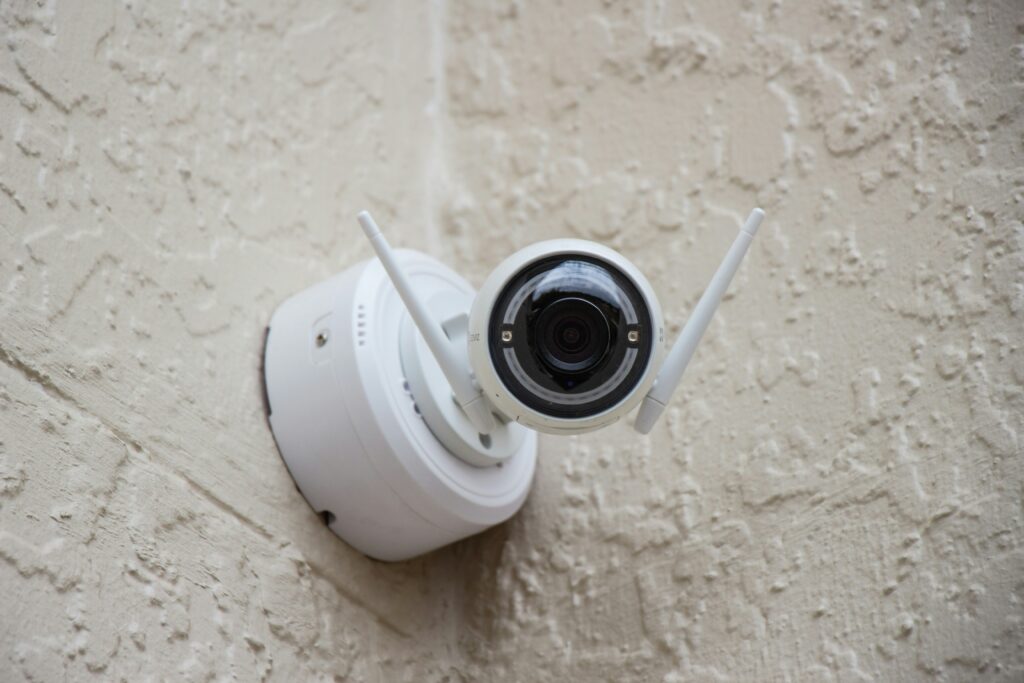
- Bullet cameras: These cameras are often visible and act as a deterrent due to their prominent shape. They are commonly used in outdoor settings and are designed to withstand harsh weather conditions. Bullet cameras are highly versatile and can be easily mounted on walls or ceilings.
- PTZ cameras: PTZ stands for Pan, Tilt, and Zoom, allowing you to control the camera’s movement and adjust the field of view remotely. These cameras are ideal for monitoring large areas as they can rotate horizontally and vertically, capturing every angle with precision.
- Wireless cameras: As the name suggests, these cameras transmit video wirelessly, eliminating the need for complex wiring. They offer flexibility in terms of installation and can be easily moved or repositioned as per your surveillance requirements. Wireless cameras are popular for both indoor and outdoor surveillance.
Key Features to Consider
When selecting security cameras, it’s crucial to consider the following key features:
- Resolution: Higher resolution cameras capture more details, enabling better identification of people or objects. Opt for cameras with at least 1080p resolution for clear and sharp video footage.
- Low-light performance: Some cameras offer enhanced performance in low-light conditions, ensuring visibility even in the dark. Look for cameras with features like infrared night vision or wide dynamic range (WDR) to maintain image quality in challenging lighting situations.
- Weather resistance: If you plan to install cameras outdoors, look for cameras specifically designed to withstand various weather conditions like rain or extreme temperatures. These cameras are built with durable materials and sealed enclosures to protect them from dust, moisture, and other environmental factors.
- Remote access: Choose cameras that allow you to access live or recorded footage remotely via a smartphone or computer. Remote access provides convenience and peace of mind, allowing you to monitor your property from anywhere at any time.
By understanding the different types of security cameras and considering the key features, you can make an informed decision when selecting the right cameras for your surveillance needs. Whether you’re looking to secure your home, office, or any other property, investing in high-quality security cameras is a proactive step towards ensuring the safety and protection of your assets.
Pre-Installation Steps for Security Cameras
Once you have a good understanding of security cameras, it’s time to gather the necessary tools and plan for the installation process. Here are some crucial pre-installation steps to follow:
Choosing the Right Location
The placement of security cameras plays a vital role in their effectiveness. Consider the vulnerable areas around your property and identify suitable locations for installing the cameras. Some key areas to consider include entrances, windows, and blind spots. It’s also essential to ensure that the cameras are out of reach and not easily tampered with.
When selecting the right location for your security cameras, it’s important to take into account the field of view. The field of view refers to the area that the camera can capture. You want to ensure that the camera’s field of view covers the desired area without any obstructions. This will help maximize the camera’s effectiveness in monitoring and recording activities.
Additionally, consider the lighting conditions in the chosen locations. If the area is poorly lit, you may need to install additional lighting to ensure clear footage. On the other hand, if the area is well-lit, you can take advantage of the existing lighting to capture high-quality images and videos.
Gathering Required Tools and Equipment
Before you start the installation, make sure you have the following tools and equipment:
- Drill and drill bits: A drill will be necessary for creating holes to mount the cameras securely. Different drill bits may be required depending on the type of surface you are drilling into.
- Screwdriver: A screwdriver will be needed to attach the cameras to the mounting brackets or hardware.
- Cables and wires (if installing wired cameras): If you are opting for wired cameras, you will need cables and wires to connect the cameras to the recording device or monitor.
- Network cables (if installing wireless cameras): For wireless cameras, network cables may be required to establish a connection between the cameras and the network.
- Mounting brackets or hardware: Mounting brackets or hardware will be necessary to securely attach the cameras to the chosen locations.
- Power supply: Ensure you have the appropriate power supply for your cameras, whether it’s a power adapter or a power over Ethernet (PoE) switch.
- Ladder (if necessary): Depending on the height of the installation location, a ladder may be needed to reach and install the cameras safely.
Having all the necessary tools and equipment ready before starting the installation process will help streamline the process and ensure that you have everything you need to complete the job efficiently.
Detailed Guide to Installing Wired Security Cameras
If you’ve opted for wired security cameras, you’ve made a wise choice. Wired cameras offer a reliable and secure solution for monitoring your property. In this detailed guide, we will walk you through the step-by-step instructions to ensure a successful installation.
Mounting the Camera
The first step in installing a wired security camera is to choose the perfect location for it. Consider the areas that require surveillance and select a spot that provides the best vantage point. Once you’ve determined the ideal location, use the appropriate mounting bracket or hardware to secure the camera in place.
It’s crucial to ensure that the camera is level and pointed in the right direction to cover the desired area. Take your time to adjust the camera’s position, as this will directly impact its effectiveness in capturing clear footage.
Running the Wires
With the camera securely mounted, it’s time to run the cables. Carefully plan the route for the wires, taking into account any obstacles or potential hazards. It’s essential to conceal the wires as much as possible to prevent tampering and maintain a clean installation.
Use cable clips or conduit to secure the wires along the designated path. This will not only protect the cables but also ensure a neat and professional appearance. Take extra care when passing the wires through walls or ceilings, as you don’t want to damage any existing structures.
Connecting the System
Now that the camera is in place and the wires are properly routed, it’s time to connect the system. Begin by connecting the camera to the power supply using the provided cables. Ensure that the power supply is compatible with the camera’s voltage requirements.
Next, connect the camera to the recording or monitoring device. Depending on the system you’ve chosen, this may involve connecting the camera directly to a DVR (Digital Video Recorder) or an NVR (Network Video Recorder). Follow the manufacturer’s instructions to make the correct connections.
Once all the connections are made, it’s essential to test the system’s connectivity. Check if the camera is receiving power and if the recording or monitoring device is successfully receiving the camera’s feed. Make any necessary adjustments to the camera’s angle to ensure optimal coverage.
Remember, the installation process may vary depending on the specific camera and system you’ve chosen. Always refer to the manufacturer’s instructions for detailed guidance tailored to your equipment.
By following these step-by-step instructions, you can confidently install wired security cameras to enhance the safety and security of your property. Enjoy the peace of mind that comes with knowing you have a reliable surveillance system in place.
Detailed Guide to Installing Wireless Security Cameras
If you’ve chosen wireless security cameras, follow these step-by-step instructions:
Positioning the Camera
Choose the desired location for the camera, keeping in mind the signal strength and range of your wireless network. Mount the camera securely and ensure a clear line of sight to the network’s access point or router.
Connecting to the Network
Follow the manufacturer’s instructions to connect the camera to your wireless network. This usually involves entering the network’s SSID and password into the camera’s settings interface.
Configuring Your Security Camera System
Once you have successfully installed your security cameras, it’s essential to configure your system for optimal performance.
Setting Up the Software
If your cameras come with software or a mobile app, install it on your computer or smartphone. Follow the provided instructions to set up the software and connect your cameras for remote access and viewing.
Adjusting Camera Settings
Customize the camera settings to suit your specific needs. This may include adjusting motion detection sensitivity, enabling email or push notifications, or setting up scheduled recording.
By following this step-by-step guide, you can set up a security camera system that enhances the security of your home or business. From understanding the basics to installing and configuring the system, every aspect is covered to ensure a smooth and effective setup. With your new security camera system in place, you can have peace of mind knowing that you have an extra layer of protection for your property.